Bear with me - it's my first (or second, if you count the crochet-wire necklace how-to from the past).
This is what we are trying to accomplish:
What we need?
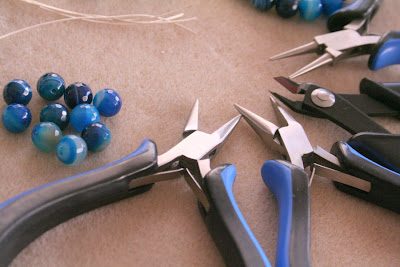
- beads - in my case - gorgeous blue faceted agate, 10 mm diameter (10 for a 23" necklace + 1 extra for the hook)
- wire: both 20 ga and 22 ga (11 pieces 3 1/4" long of the 22 ga, 11 pieces 3 1/2 " long of the 20 ga, plus 4" 20 ga for the hook, and ~ 2" of the 22 ga for the hook)
- jump rings (21 4mm or larger, as you fancy)
- 2 chain nose pliers
- 1 round nose pliers
- 1 flush cutter
- wire jig for the wire connectors
- hammer and pad for hardening the wire (connectors)
First we make the 10 bead connectors: take one 3 1/4" 22 ga piece of wire and with the chain nose pliers make a 90 degree bend at 3/4" from one end. With the round nose pliers, make a loop
Wrap the wire 2-3 times, and press the end in. Place the bead, and make repeat the wire wrapping at the other end: another 90 degree bend, loop, and 2-3 wraps.
Flush-cut the wire snugly against the bead, letting the bead to move a little bit:
Finish all 10 connectors and set aside:
Place 2 small and 2 medium pegs in the wire jig and create the wire connectors. You can work with pre-cut lengths of wire, or directly from the spool (I prefer to work from the spool on the wire jig). Adjust the wire connector by hand, to make the sides equal and nice.
Make all 11 connectors, then lightly hammer them to harden the pieces.
Using the last 20 ga piece of wire - make a beaded hook: at one end of the wire make one half of the wire-wrapped bead connector, at the other end create a hook. Keep the bead in place by lightly wrapping a 22 ga piece of wire around it. Hammer the hook ends for hardening.
Using the jump rings connect each bead connector to a wire connector, alternating.
The resulting necklace is light and beautiful - and you can combine other metals: think turquoise and copper, gold / brass and pearls, the sky is the limit! I intend to add a bracelet and a pair of earrings - the earrings will be one wire connector and one bead connector.
Enjoy!


That is stunning and an awesome tutorial!!! The only thing that could have made it absolutely perfect was a more close up picture of the hook at the end. But, I could see from the picture what the hook looked like enough to understand how to do it! I'm definitely going to have to try something like this! =) Thank you for posting it!!! =)
ReplyDeleteThanks, Kelli - yes, I was feeling the same about the hook... keep in mind the end-result pictures are taken @ 1:00 am in the morning last night :) I'll get a couple of better close-ups in the afternoon light and update the article.
DeleteWonderful! and really beautiful finish - lovely necklace. I have total 'wire envy' from your wrapping skills :)
ReplyDeleteThank you! I can't even claim it comes with practice - but I know practice makes it better :)
DeleteOk, I don't do wirework, and I can easily follow this! What a beautiful necklace! And I'd love to get my hands on some of those beads, I love the faceting on them.
ReplyDeleteThanks, Shirley - maybe now is the moment to start :) Aren't they (the blue agate) gorgeous?
DeleteVery easy to follow and detailed first tutorial. Love the necklace!
ReplyDeleteThanks, Kashmira!
DeleteAm absolutely sure I can use your instructions after reading this tute. Great Job!
ReplyDeleteThanks, Marlene - I hope you will use them :) Please share when you do!
DeleteLovely necklace and a very good tutorial!
ReplyDeleteThank you, Cindy, you're very kind!
Delete